My Mother-in-law is wonderful. She is actually partially responsible for me starting to quilt in the first place since she is the one that bought me my sewing machine a decade ago - I can't believe that it has been that long already. Now, she didn't quilt herself but that was what I wanted to do with the machine and I loved it but - without any pressure from me - she has recently started quilting too. She was, well, "encouraged" by family in the town she lives in and I am tickled about it even if we do live almost three hours driving apart.
 I decided to suggest that we do a Farmer's Wife quilt along together. It was mostly because I thought it would be fun for us but also because I thought it could help her learn in manageable chunks. Well, she agreed and then at a Family Reunion we all went to in the area she lives in we got two more Farmer-a-longers!
First thing we did was order the Farmer's Wife Sampler Quilt Book from Amazon Canada. I ordered the book for both of us before the Reunion and the two books together got us over the price point to get free shipping so they were $21 each. The other two ladies ordered their books together too so they got them for the same price.
 The book does the whole quilt from templates which you print off from a CD that comes with the book. The author then hand pieced the quilt from the templates. While I did hand piece my Flower Garden quilt, I didn't want a hand pieced quilt this time so I have taken each of the 111 blocks and drew them all out on graph paper to scale. From this I will be able to figure out fairly easily what we need to do in order to machine piece the quilt. I can see the proportions, measurements and just what is needed in general.
Each week I will post instructions as best as I can manage for machine piecing two or three blocks. I do have the methods that I have learned for making things like HSTs (Half Square Triangles) or Flying Geese that I will post but if you have a method that you prefer, by all means, use that one. I am planning to start with what should be the easiest ones for my Mother-in-law and progress to harder ones from there. There are even a few that I have to figure out. One has a Y-seam which I have never done either. Some certainly look like they will be easier with foundation piecing.
The book does not tell you what the fabric requirements are for the quilt blocks. Probably because the author did hers scrappy but it would certainly be nice if she gave you even a vague idea of how much fabric to purchase for the blocks. The book does tell you how much to purchase for the backing, batting, sashing and cornerstones at least. I looked online and got a variety of answers but the answers ranged from 10 to 25 metres.
If you are going to go scrappy, I can only suggest that you have a lot for a variety of options at this point. Personally, I do NOT have anywhere near enough scraps to do this so I went and bought fabric. In about a year, when we should have our blocks complete, I am hoping to be able to post an approximation of what I have used.
 At this point I have purchased 0.6 metres of 34 fabrics and 1 metre of two more fabrics. I purchased a full metre of the white-on-white figuring it could work anywhere and a full metre of the darker yellow because when it was cut it was the only yellow of the line I had found. During the cutting, the staff member pointed out a second (and only other) yellow in the line so I added a 0.6 metre cut of the second yellow and left it there.
I didn't bring the book with me on my fabric run so I didn`t have the requirements with me for the sashing and cornerstones and regretted it. I went back later to get what I needed because I realized that I wanted the sashing, cornerstones and binding from the same line consider that the line I chose is somewhat unique.
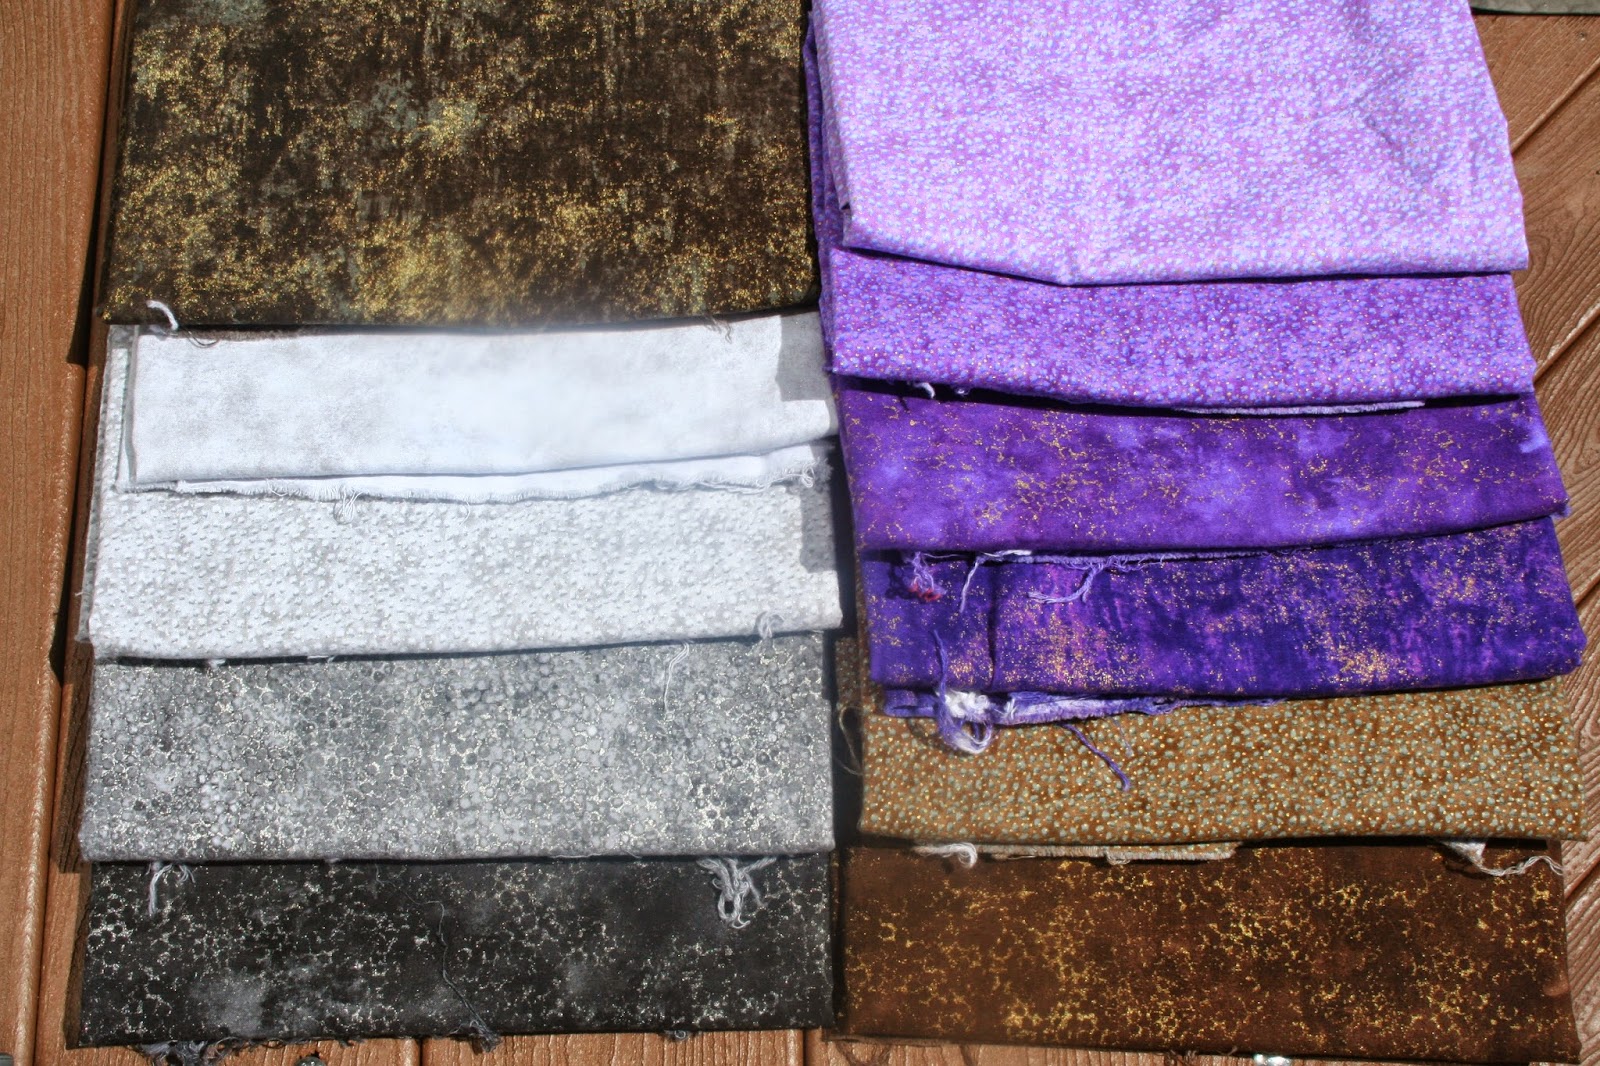 The fabric that I chose is from the line called Shimmer. There isn`t much yellow and there is no white in the line but other than that I got a full rainbow of colours. Each one has some silver or gold running through it. Not just a yellow gold or a grey silver but an actual shiny gold and silver that shimmers. The fabrics are absolutely scrumptious to me but I did decide that with each block shimmering, I didn`t want the sashing, cornerstones and binding to not shimmer too. The sashing is black and the cornerstones are grey. The binding is one of the lighter blue-greens. I don`t usually make sashing, border and binding decisions this early but since I made the decision of wanting them to shimmer and knowing that I can also count on there not being enough Shimmer in a year, I just went ahead and did it.
Next Friday we will start with the first two blocks. I will post instructions for the method I have used but feel free to use whatever method you like. I am looking forward to quilting along with you this year with my Farmer's Wife Friday!
Tara.
No comments:
Post a Comment