Next week is Spring Break here so I have the kids home all week. I know that I won't get any sewing done but I already have the blocks for next Friday pieced so I know that I am good for next week.
Look what I got!
 Quinn first went to my LQS, Earthly Goods, on the 23rd of December to get this for me but they were closed so he came home and ordered it online direct from the Oliso web site. We don't like to shop at all Boxing Day week so he figured that this would get me the iron more quickly.
When it wasn't here in a couple of weeks we called and they said it was backordered and would be here by the 23rd of January. When it wasn't here a couple of weeks after that date we called again and they said that there were problems at the factory and that it would be here in a couple of weeks. It still didn't show so a week after that date we called and they said that it was in the shipping containers on the west coast and it would just be a couple of weeks more. Once again we waited but it still didn't come. I called my LQS and they had one in stock so I called again and they gave me the same story about it being in the shipping containers on the west coast so I cancelled the order. At this point it had been almost three months since he ordered it and I was sick of their excuses.
Unfortunately, I had read all of the reviews of all sorts of different quilting irons while I waited and this was still the best fit for me so even though a part of me wanted to buy a different iron, a bigger part of me still wanted this one so I went to my LQS and bought it.
I do love it though. It is taking some getting used to since I have been ironing with a traditional iron for thirty years but I love my new iron. I love my wonderful husband and although he feels terrible that I had to wait for three months for my iron, I'm okay with it because he tried to do something so sweet and wonderful and I love him so much for it.
We have been having a lovely spring thaw and we have been loving it. All of us here have had quite enough of winter. We actually got to get the bikes down from the garage ceiling a few weeks ago. Of course I knew it was too good to be true enough to last and we got a big snowstorm last week. We shovelled, cleaned it up and things are melting again. The kids got to ride their bike again yesterday. I am quite sure that they will get lots of bike riding done next week while they are off school.
Otherwise I have some lovely photos from Suzanne. First we have End of Day:

And then we have another End of Day:

We have Darting Birds:

And Country Path:

Then Morning:

And last but not least, Corn and Beans:

I love these blocks.
This week we will start with Block #43 - Garden Path.
 Cut two 1 1/2" x 1 1/2" purple squares.
Cut two 1 1/2" x 1 1/2" blue squares.
Cut two 1 1/2" x 1 1/2" green squares.
Cut two 1 1/2" x 1 1/2" orange squares.
Cut four 2" x 2" grey squares.
Cut one 2" x 2" purple square.
Cut one 2" x 2" blue square.
Cut one 2" x 2" green square.
Cut one 2" x 2" orange square.
Cut six 1 7/8" x 1 7/8" grey squares. Cut these on the diagonal.
Cut two 2 1/2" x 2 1/2" grey squares. Cut these on the diagonal.
Cut two 1 1/4" x 3 3/8" red rectangles.
Cut two 1 1/4" x 4 3/4" red rectangles.

Sew one of each of the 1 1/2" squares into a four patch.
Match one 2" grey square with each of the 2" coloured squares. Make these into HSTs and trim to 1 1/2" x 1 1/2".
Organize your pieces the way you want them to look.

Place one small square RST with an HST. Sew a 1/4" seam, set the seam and press to one side. Repeat with the other three small squares.
Place one small grey triangle RST with an HST with the corners matching. Sew a 1/4" seam, set the seam and press to one side. Repeat with the other three HSTs
Centre the long edge of one of the large grey triangles along the edge of the four patch you pieced. Sew a 1/4" seam, set the seam and press to one side. Repeat with another large grey triangle on the opposite side of the four patch.

Centre the large side of another large grey triangle RST with the four patch.Sew a 1/4" seam, set the seam and press to one side. Repeat with the last large grey triangle on the last remaining side of the four patch.
Place one small grey triangle RST with the corners matching with the HST of the square/HST set. Sew a 1/4" seam, set the seam and press to one side. Repeat for the other three square/HST sets.
Place one small grey triangle RST with the corners matching with the triangle/HST set. Sew a 1/4" seam, set the seam and press to one side. Repeat with the other three triangle/HST sets.

Place the square/HST/triangle set RST with the triangle/HST/triangle set with the corners matching. Sew a 1/4" seam, set the seam and press to one side. Repeat for the other three sets.
Place one small red rectangle RST with the edge of the centre piece. Sew a 1/4" seam, set the seam and press to one side. Repeat with the other small red triangle on the opposite side of the centre piece.

Place the large red rectangle RST on a remaining side of the centre piece. Sew a 1/4" seam, set the seam and press to one side. Repeat with the last large red rectangle on the last side of the centre piece.
Place one of the pieced triangles RST with the edge of the red rectangles. Sew a 1/4" seam, set the seam and press to one side. Repeat with another of the pieced triangles on the opposite side of the centre piece. Sew a 1/4" seam, set the seam and press to one side.
Place another of the pieced triangles RST on a remaining side of the centre piece. Sew a 1/4" seam, set the seam and press to one side. Repeat with the last pieced triangle on the last side of the centre piece and the first block for this week is complete!

The second block for this week is Block #75 - Rosebud.
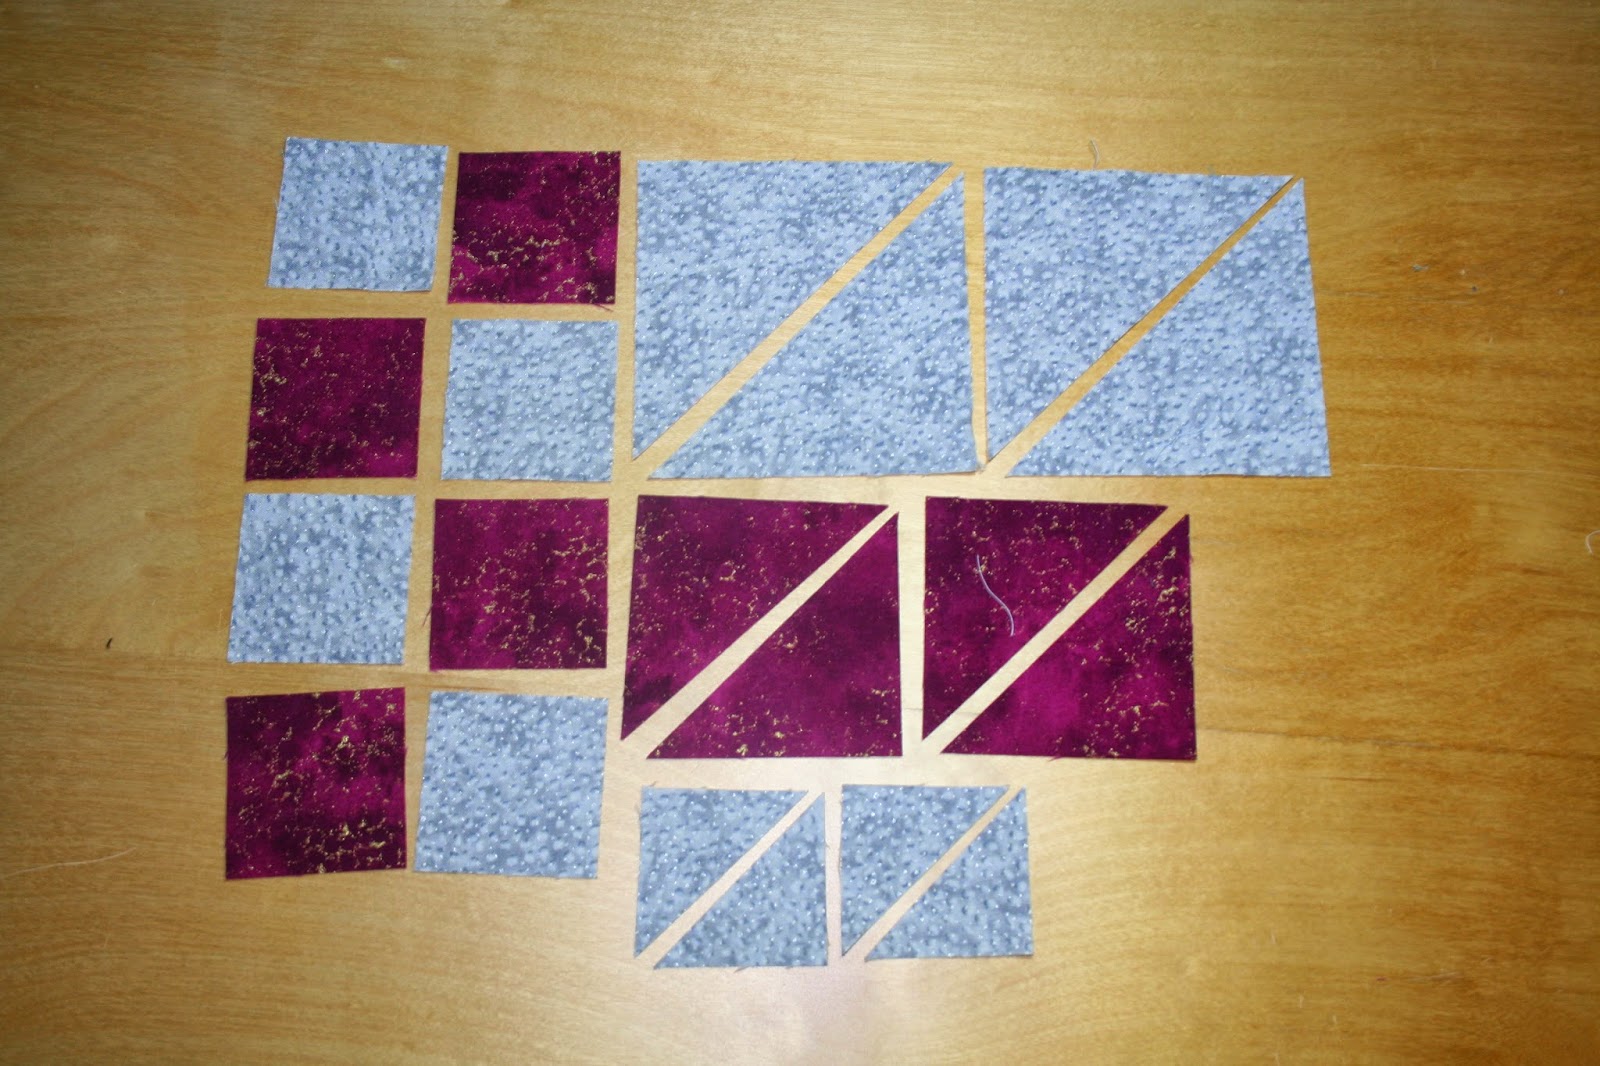 Cut two 3 7/8" x 3 7/8" grey squares. Cut these on the diagonal.
Cut four 2" x 2" grey squares.
Cut four 2" x 2" raspberry squares.
Cut two 2 7/8" x 2 7/8" raspberry squares. Cut these on the diagonal.
Cut two 1 7/8" x 1 7/8" grey squares. Cut these on the diagonal.

Match each of the grey squares RST with a raspberry square and make them into HSTs.
Organize the pieces the way you want them to look.

Place one of the HST RST with another HST. Sew a 1/4" seam, set the seam and press to one side. Repeat with the other HSTs.

Place a small grey triangle RST with the HST pair with the corners matching. Sew a 1/4" seam, set the seam and press to one side. Repeat with the other three small grey triangles and the other three HST pairs.

Place the large raspberry triangle RST with the HST strip with the corners matching. Sew a 1/4" seam, set the seam and press to one side. Repeat with the other three raspberry triangles and HST strips.

Place the long edge of the large grey triangle RST with the long edge of the triangle you pieced. Sew a 1/4" seam, set the seam and press to one side. Repeat with the other large grey triangles and the triangles you pieced.
You now have a basic four patch to put together. Place two squares RST and sew a 1/4" seam, set the seam and press to one side. Repeat with the other two squares.
Place the two large rectangles RST with each other. Sew a 1/4" seam, set the seam and press to one side and the second block for this week is finished.

Our third block wasn't originally on the schedule for this week. It was a block that we didn't do on week nine and then I kind of forgot about. With the difficulty of the blocks we are working on now, this block should be super quick.
With that, the third block for this week is Block #107 - Windblown Square.
 Cut eight 2 1/2" x 2 1/2" purple squares.
Cut four 2 1/2" x 2 1/2" green squares.
Cut four 2 1/2" x 2 1/2" green squares.

Place each of the purple squares RST with either a red or a green squares. Make all of these into HSTs. Trim each HST to 2" x 2".
Organize your pieces the way you want them to look.

Place the HSTs RST into pairs. Sew a 1/4" seam, set the seam and press to one side.

We are now going to make the HST pairs into four patches. Place the pairs RST, sew a 1/4" seam, set the seam and press to one side.

Place two of the four patches RST, sew a 1/4" seam, set the seam and press to one side. Repeat for the other four patch pair.
Lastly, place the two pieced rectangles RST. Sew a 1/4" seam, set the seam and press to one side and the third block for this week is finished!

With that, we'll see how Spring Break goes next week and how we all survive! Spring Break is so much fun and we are so looking forward to the spring weather but the kids get bored with a whole week at home and I get no machine sewing done.
So, have fun and I'll see you next week!
Tara.
No comments:
Post a Comment